Motivation
I wanted to automate three standard blinds from a brand called Paquetto (hence the name of this project) just for the fun of it, even though projects involving hardware usually take too much of my limited time. The challenge of creating a smart home solution from scratch was too interesting to pass up.
The goal was to retrofit existing blinds without replacing them entirely, making this a non-destructive modification that could be reversed if needed. Plus, I wanted to learn more about ESP32 development, Bluetooth Low Energy (BLE) secure pairing, and explore the possibilities of remote access through VPN solutions like Wireguard.
Parts List
- ESP32 microcontroller (with BLE and WiFi)
- Small OLED display (for showing pairing PIN)
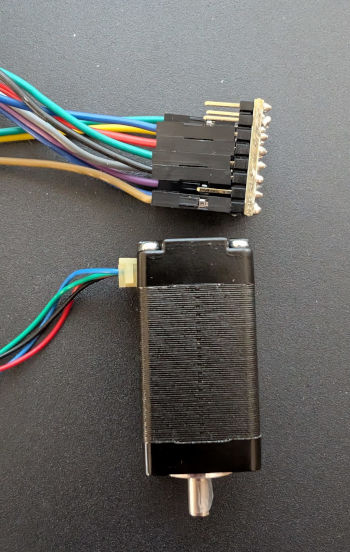
- Low profile stepper motors (3x)
- Low power stepper motor drivers (3x, compatible with ESP32)
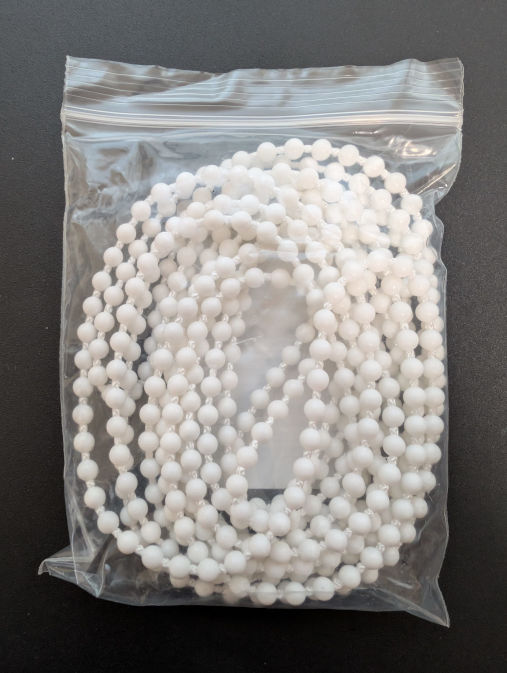
- Spare chains (for non-destructive assembly)
- 3D printed mounting hardware
- Power supply unit (5V/12V depending on motors)
- Cabling and connectors
- Android device with Termux (for testing and control until the App is ready)
Main Parts/Hardware for the Blind
The core components for each blind automation unit consist of carefully selected hardware to ensure a low-profile, efficient design:
- Low profile stepper motors: These are essential for fitting into the limited space at the top of the blind mechanism. Their slim design allows for discrete installation.
- Low power stepper drivers: Compatible with the ESP32's GPIO pins, these drivers provide precise control while keeping power consumption reasonable.
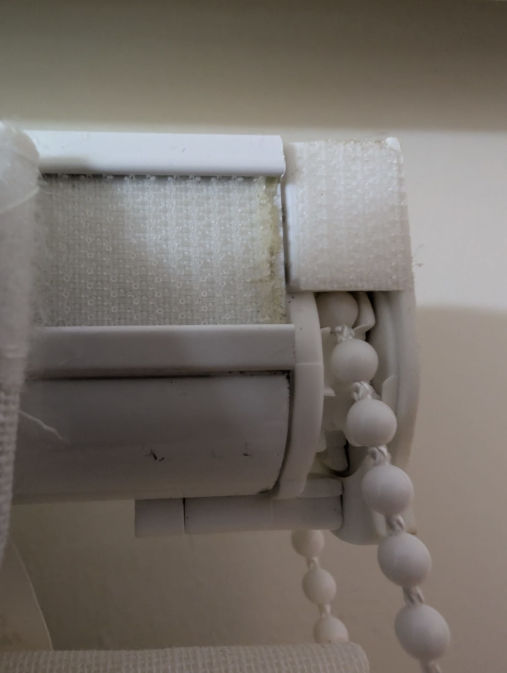
- Spare chains: Rather than modifying the original blind mechanism, I sourced compatible replacement chains. This allows for a completely non-destructive installation - the original chains can be reinstalled at any time.
The beauty of this approach is that the blinds remain fully functional even if the automation system is removed.

Assembly
The assembly process offers two distinct approaches, both leveraging 3D printing technology:
Option A: Mechanism Replacement
The original blind mechanism can be disassembled and replaced with a 3D-printed alternative that houses the stepper motor. This provides the cleanest integration but requires more extensive modification.
Option B: Overlay Mounting (Ideal)
The easier approach involves creating a 3D-printed overlay that mounts on top of the existing blind mechanism. Thanks to the low profile of the stepper motors, this solution is remarkably discrete and requires minimal modification to the original hardware.
All three blinds are connected via discrete cabling that runs along walls and corners until reaching the central hub - the main ESP32 microcontroller with its OLED screen and communication capabilities. The central unit handles all the coordination, pairing, and network connectivity.
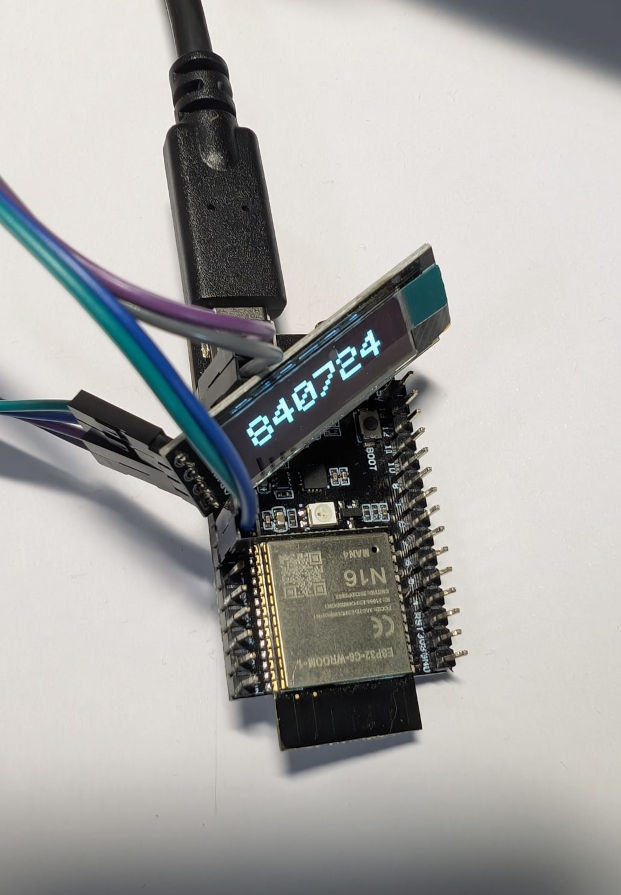
Main Microcontroller and Pairing
The heart of the system is an ESP32 microcontroller equipped with:
- Built-in Bluetooth Low Energy (BLE) for secure local communication
- WiFi connectivity for network access and potential "public network" integration
- Small OLED display for showing status and pairing information
Secure BLE Pairing
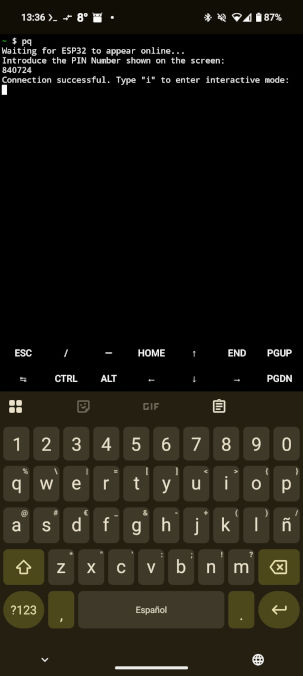
One of the key features is the secure pairing process. When initiating a connection from the Android app or the temporary Termux based script, the ESP32 generates a random PIN code and displays it on the OLED screen. This ensures that only someone with physical access to the device can pair with it, preventing unauthorized access.
The pairing workflow:
- User presses the pair button on the ESP32
- PIN code appears on the OLED display
- User enters PIN in the Android app
- Secure BLE connection is established
Current Control Interface
I've successfully tested the entire setup on a workbench, including all motor controls and pairing procedures. Currently, I'm using a simple bash interface running in Termux on Android for sending commands to the blind's hardware. While basic, it's functional and allows for full control of all three blinds.
Future: Wireguard Integration
I'm also exploring ESP32-compatible Wireguard implementations to enable direct out-of-home WiFi connection and interaction. This would allow me to control the blinds remotely through a secure VPN tunnel, without relying on cloud services or exposing the ESP32 directly to the internet.